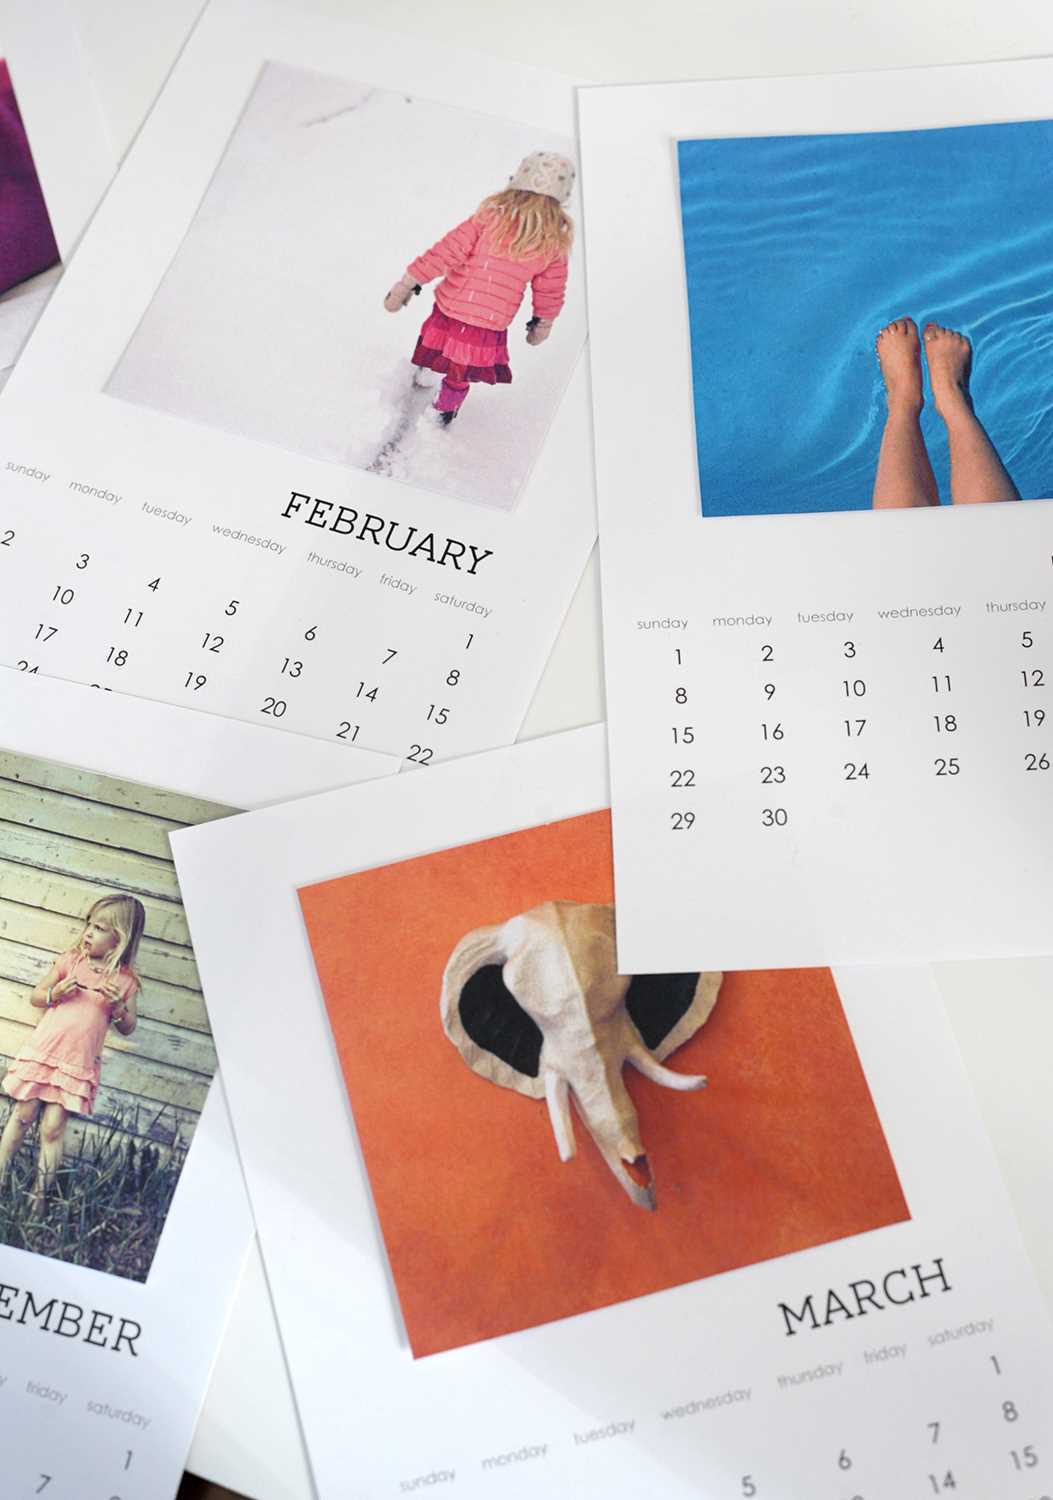
Creating a unique organizer can be an enjoyable project that adds a touch of creativity to your space. This venture allows you to express your personal style while staying on top of your plans and commitments. Whether you’re looking to manage your time better or simply want a decorative piece, a customized solution can serve multiple purposes.
Imagine designing a functional tool that reflects your preferences and enhances your productivity. You can choose colors, layouts, and themes that resonate with you, making each glance at it a delightful experience. By taking a hands-on approach, you not only craft a useful item but also engage in a fulfilling activity that can spark joy and satisfaction.
This guide will provide you with insights and steps to create your own personalized time management tool. With a little effort and imagination, you’ll transform simple materials into a striking piece that suits your needs perfectly.
Creative Ideas for Desk Calendar
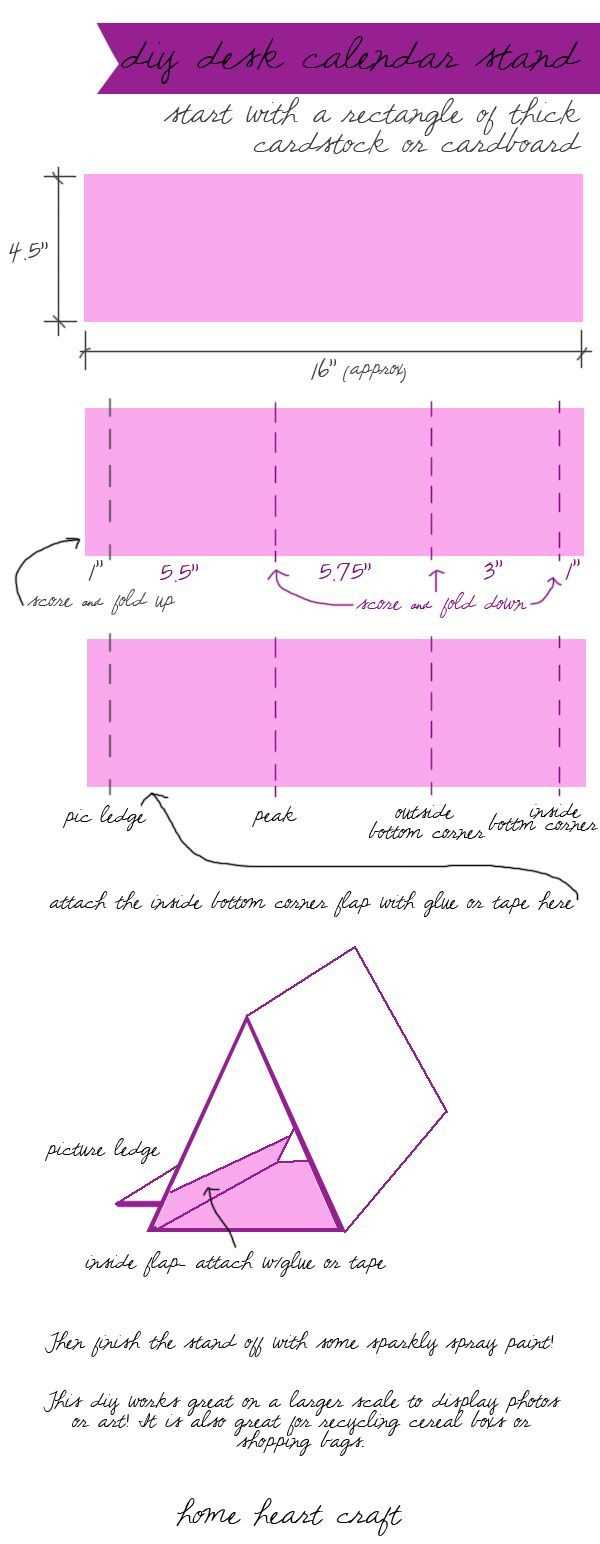
Transforming a simple timekeeping tool into a personalized and functional piece of art can greatly enhance your workspace. By incorporating unique designs, themes, and materials, you can create an engaging item that reflects your personality and inspires productivity.
1. Thematic Designs: Choose a specific theme that resonates with your interests, such as nature, travel, or quotes. Each month can showcase images or illustrations that align with the chosen motif, providing a cohesive aesthetic throughout the year.
2. Functional Additions: Integrate practical elements like sticky notes, a small notepad, or a section for reminders. This multifunctionality not only enhances usability but also keeps essential tasks organized and visible.
3. Interactive Features: Include elements that allow for interaction, such as a dry-erase surface for jotting down tasks or special events. This adaptability can make the item more dynamic and useful in daily life.
4. Personal Touches: Incorporate personal photos, hand-drawn illustrations, or meaningful quotes to make it uniquely yours. Personalization fosters a deeper connection and motivation each time you glance at it.
5. Upcycled Materials: Explore using recycled materials for an eco-friendly approach. Old magazines, fabric scraps, or wood pieces can add texture and character while contributing to sustainability.
By experimenting with these concepts, you can craft a captivating and useful item that brightens your space and serves as a constant reminder of your goals and aspirations.
Choosing the Right Materials
When embarking on a creative project, selecting the appropriate substances is crucial to achieving a satisfactory outcome. The choice of materials influences not only the aesthetics but also the durability and functionality of the final product. Understanding the properties of various options can significantly enhance your crafting experience.
To guide you in this decision-making process, consider the following factors:
| Material Type | Advantages | Considerations |
|---|---|---|
| Cardstock | Sturdy and versatile, ideal for printing | May require a heavy-duty printer for best results |
| Wood | Adds a rustic charm and durability | Requires tools for cutting and finishing |
| Plastic | Water-resistant and easy to clean | Can be difficult to bond with adhesives |
| Fabric | Soft texture, offers a unique look | May need a backing for support |
Each material presents its own set of benefits and challenges. Evaluating these aspects in relation to your project will help you make informed choices, ensuring that the end result is not only visually appealing but also practical for everyday use.
Designing Your Calendar Layout
Creating an effective layout for your time management tool is crucial for enhancing its usability and visual appeal. A well-structured design not only organizes information clearly but also allows for personalization, making it more enjoyable to use.
Consider the following elements when planning your layout:
- Size and Format: Decide on the dimensions and overall format. Will it be portrait or landscape? A larger format may provide more space for notes.
- Grid Structure: Choose a grid style that suits your needs. Common options include monthly, weekly, or daily grids. Each has its advantages depending on how you plan to track your activities.
- Color Scheme: Select a color palette that reflects your personality or the season. Colors can evoke emotions and influence how you perceive tasks.
- Typography: Use clear and readable fonts. Consider a mix of font sizes for headers and body text to create a visual hierarchy.
When finalizing your design, think about incorporating additional features:
- Notes Section: Include space for notes or reminders. This adds functionality and helps keep important information at hand.
- Decorative Elements: Personal touches such as illustrations, stickers, or borders can make your design unique and inspiring.
- Monthly Themes: Consider creating different themes for each month, adding variety and excitement throughout the year.
By thoughtfully designing your layout, you can create a functional and aesthetically pleasing tool that enhances your daily planning experience.
Incorporating Personal Photos
Integrating personal images into your project adds a unique touch, creating a more meaningful experience. This approach allows you to showcase cherished memories, making the final product not just functional but also sentimental. By selecting images that resonate with you, you can enhance both the aesthetic appeal and emotional connection of your creation.
Choosing the Right Images
When selecting photographs, consider the themes or moments that hold special significance. Here are some tips for choosing the right visuals:
| Type of Photo | Purpose |
|---|---|
| Family Portraits | Foster a sense of belonging and warmth. |
| Travel Snapshots | Inspire wanderlust and remind you of adventures. |
| Milestone Events | Celebrate achievements and special moments. |
Arranging Images Creatively
Once you’ve chosen your photographs, think about how to arrange them. Consider creating a collage or using a grid layout for a modern look. Varying the sizes of the images can also add visual interest. Don’t hesitate to experiment with different placements to find the perfect balance.
Using Digital Tools for Creation
In today’s technology-driven world, leveraging digital resources can significantly enhance the process of crafting personalized projects. Various applications and platforms offer innovative features that streamline design and customization, making the creative journey both enjoyable and efficient.
Benefits of Digital Solutions
- Flexibility: Digital tools provide the ability to easily modify and adjust designs according to individual preferences.
- Access to Resources: A wealth of templates, graphics, and fonts are available online, allowing for greater creativity.
- Collaboration: Many platforms enable sharing and collaboration, facilitating input from multiple users.
Popular Tools to Consider
- Graphic Design Software: Applications like Adobe Illustrator or Canva offer powerful features for creating stunning visuals.
- Online Platforms: Websites like Google Slides or Microsoft PowerPoint provide easy-to-use interfaces for organizing and presenting ideas.
- Project Management Apps: Tools such as Trello or Asana help in planning and tracking progress, ensuring that deadlines are met.
Printing Options for Your Calendar
Choosing the right methods for producing your time management tool can significantly impact its functionality and aesthetic appeal. Various techniques offer different results, enabling you to customize your creation according to personal preferences and requirements. Understanding these options will help you make informed decisions to achieve the best outcome.
Paper Selection
The type of material you select plays a crucial role in the overall quality of your printed item. Consider the following options:
| Paper Type | Description | Best Use |
|---|---|---|
| Standard Printer Paper | A cost-effective option, suitable for everyday use. | Basic projects and drafts. |
| Cardstock | Thicker and sturdier, providing a more professional feel. | Finished products that need durability. |
| Glossy Paper | Shiny finish that enhances colors and details. | Visual designs that require vibrant presentation. |
| Recycled Paper | Environmentally friendly choice, often with a unique texture. | Eco-conscious projects. |
Printing Techniques
Selecting an appropriate printing technique can enhance the appearance of your project. Here are a few popular methods:
| Technique | Description | Advantages |
|---|---|---|
| Inkjet Printing | Uses liquid ink to create images and text. | High-quality color and detail. |
| Laser Printing | Uses toner and heat to produce sharp text and graphics. | Fast and cost-effective for larger quantities. |
| Professional Printing Services | Utilizes industrial-grade machines for large-scale production. | Exceptional quality and options for customization. |
Binding Techniques for Durability
When creating a personalized planner, ensuring its longevity is crucial. The choice of binding method can significantly influence the durability and usability of the finished product. Selecting the right technique not only enhances the aesthetic appeal but also withstands daily use, making it essential to consider various binding options available.
Spiral Binding
Spiral binding is a popular choice due to its flexibility and ease of use. This method involves inserting a continuous coil through pre-punched holes along the spine of the sheets. It allows pages to lay flat, making it convenient for writing and note-taking. Additionally, spiral binding accommodates various page counts, making it suitable for different projects.
Thermal Binding
Thermal binding provides a sleek, professional finish. This technique involves using a heat-activated adhesive to bond the pages together within a cover. It is ideal for creating a polished look, and the durability of the adhesive ensures that pages remain securely attached over time. This method is particularly effective for thicker compilations, ensuring that they endure frequent handling.
Adding Inspirational Quotes
Incorporating motivational sayings into your project can enhance its appeal and provide daily encouragement. These phrases can serve as a source of positivity, helping to uplift spirits and inspire creativity. Selecting the right quotes is essential to ensure they resonate with your audience and add value to the overall design.
Choosing the Right Quotes
When selecting inspirational sayings, consider the following factors:
- Relevance: Ensure the quote aligns with the theme or purpose of your project.
- Length: Opt for concise quotes that can be easily read and remembered.
- Author: Choose quotes from well-known individuals or sources that add credibility.
Placement and Design
Effective positioning and styling of the quotes can significantly impact their visual appeal. Here are some tips for placement and design:
- Highlighting: Use larger fonts or contrasting colors to make the quotes stand out.
- Spacing: Ensure adequate spacing around the text to maintain clarity.
- Consistency: Maintain a uniform style for all quotes to create a cohesive look.
By thoughtfully integrating motivational phrases into your work, you can inspire and energize those who engage with it.
Monthly Themes and Variations
Creating a personalized experience throughout the year can be achieved by incorporating various themes for each month. This approach not only enhances visual appeal but also allows for unique expressions that reflect personal interests and seasonal changes.
Below is a table showcasing potential themes and variations that can be utilized for each month:
| Month | Theme | Variation Ideas |
|---|---|---|
| January | New Beginnings | Motivational quotes, fresh starts |
| February | Love and Friendship | Heart motifs, relationship quotes |
| March | Spring Awakening | Floral designs, nature themes |
| April | Rainy Days | Watercolors, cloud patterns |
| May | Growth and Renewal | Greenery, plant illustrations |
| June | Summer Vibes | Beach scenes, vibrant colors |
| July | Adventure and Travel | Maps, travel quotes |
| August | Harvest Time | Fruit designs, earthy tones |
| September | Back to School | Stationery, educational quotes |
| October | Autumn Colors | Foliage, warm tones |
| November | Gratitude | Thanksgiving themes, thankful prompts |
| December | Festive Cheer | Holiday motifs, winter scenes |
By selecting and adapting themes each month, the experience becomes more engaging and tailored, encouraging creativity and personal reflection.
Customizing with Stickers and Art
Personalizing your creation can transform it into a unique expression of your style. Incorporating decorative elements not only adds visual appeal but also allows for creativity to shine through. Whether you prefer vibrant illustrations or subtle embellishments, there are endless ways to enhance your project.
Choosing the Right Stickers
Selecting stickers is an essential step in the personalization process. Consider these tips when choosing your decorative pieces:
- Theme: Choose stickers that align with the overall theme you wish to convey.
- Size: Opt for various sizes to create a dynamic layout.
- Material: Use stickers made from durable materials for longevity.
Incorporating Art Techniques
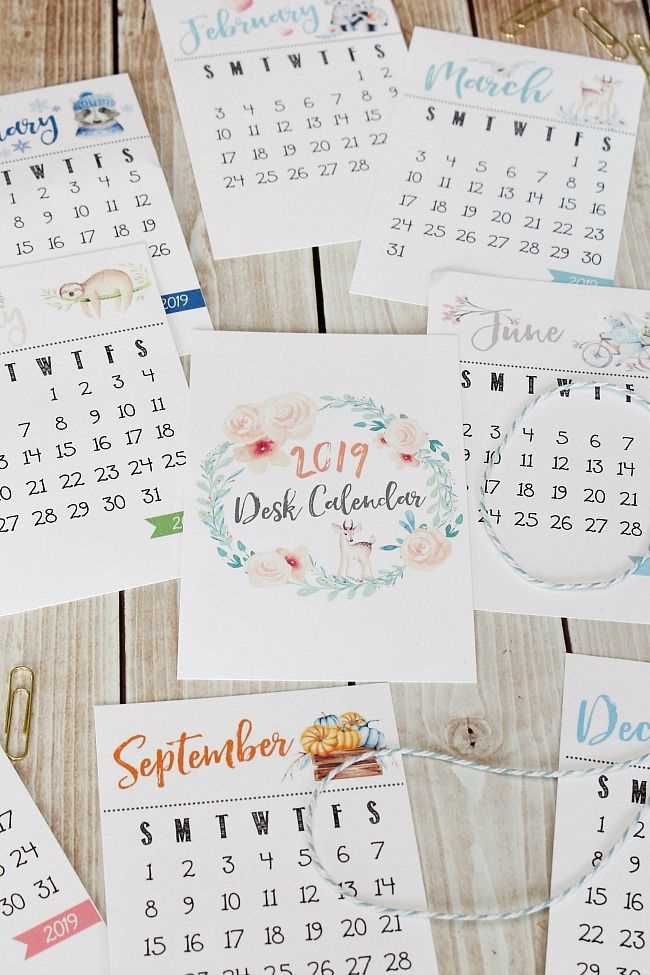
In addition to stickers, various artistic techniques can further enhance your design:
- Drawing: Hand-drawn illustrations can add a personal touch.
- Watercolor: Use watercolor paints for soft, artistic backgrounds.
- Collage: Combine different materials and textures for a mixed-media effect.
By thoughtfully integrating stickers and artistic elements, you can create a visually stunning and personalized piece that reflects your individuality.
Making It Functional and Stylish
Creating a time management tool that balances both practicality and aesthetics can greatly enhance your workspace. The key is to design an item that not only serves its purpose effectively but also complements your personal style and decor.
Choosing the Right Materials
Selecting appropriate materials is crucial for both functionality and appearance. Consider the following options:
- Paper: High-quality paper adds a touch of elegance and durability.
- Wood: A wooden base provides sturdiness and a natural aesthetic.
- Fabric: Using fabric for accents can introduce texture and color.
Incorporating Personal Touches
Personalization can elevate your creation and make it truly yours. Here are some ideas:
- Use custom illustrations or patterns that resonate with your style.
- Include motivational quotes or notes to inspire you daily.
- Opt for a color scheme that matches your workspace theme.
By focusing on these elements, you can achieve a practical and visually appealing piece that enhances your daily routine.
Eco-Friendly Calendar Alternatives
In a world increasingly focused on sustainability, opting for environmentally conscious options is essential. Many individuals seek innovative ways to keep track of dates without relying on traditional paper products. This shift not only reduces waste but also promotes a greener lifestyle.
Recycled Paper Solutions
One effective approach is using recycled paper for creating your planning tools. By choosing materials that have already served a purpose, you minimize the demand for new resources. This practice supports recycling initiatives and decreases the overall carbon footprint associated with manufacturing fresh paper.
Digital Options
Embracing technology can also provide eco-friendly solutions. Various applications and software allow users to manage their schedules without any physical materials. These digital alternatives offer flexibility and can be easily updated, making them a practical choice for those looking to reduce their environmental impact.
Involving Family in the Process
Engaging family members in creative activities can enhance the experience and foster togetherness. When everyone participates, the project transforms into a collaborative effort, allowing for shared ideas and unique contributions. This involvement not only strengthens bonds but also encourages communication and teamwork.
To begin, gather everyone around and brainstorm ideas. Discuss themes, colors, and designs that resonate with each person. Assign tasks based on individual strengths and interests, ensuring that everyone has a role. For instance, younger family members can assist with decorating, while older ones might handle planning and organization.
Throughout the process, celebrate each milestone. Take breaks to enjoy snacks and share laughs, making it a memorable occasion. Document the journey with photos to capture the moments spent together. This approach will not only create a cherished item but also lasting memories of collaboration and creativity.
Gift Ideas Featuring Your Calendar
Creating personalized timekeepers can lead to unique gift opportunities that celebrate special moments and milestones. These custom creations not only serve practical purposes but also add a touch of warmth and thoughtfulness to any occasion. Here are some inspiring ways to incorporate your crafted timepieces into delightful presents.
Customized Sets
Pair your personalized time management tools with matching accessories, such as stylish pens, decorative clips, or themed stickers. These combinations enhance the overall aesthetic and make for a cohesive and appealing gift set. Consider wrapping them in beautiful packaging to elevate the presentation.
Memory Keepsakes
Transform your thoughtfully designed timekeepers into cherished keepsakes by adding personal touches, like favorite quotes, photographs, or meaningful dates. This approach creates a sentimental gift that the recipient can treasure for years to come, making every glance a reminder of special moments shared.
Storing and Displaying Your Creation
Once you’ve crafted your unique planner, it’s essential to consider how to preserve and showcase it effectively. Proper storage not only protects your work from damage but also enhances its visual appeal when displayed. Whether you prefer a minimalist approach or something more decorative, there are numerous ways to organize and exhibit your project.
One practical method is to use a binder or folder to keep the pages safe from wear and tear. This allows for easy flipping through and maintaining order. Alternatively, you might opt for a frame or a clip system that highlights specific sections, adding a touch of elegance to your environment.
| Storage Method | Description |
|---|---|
| Binder | A practical solution that allows for easy access and protection of each page. |
| Clip Display | A stylish way to showcase individual pieces while keeping them accessible. |
| Wall Frame | Creates an artistic focal point, perfect for highlighting your work. |
| Digital Storage | Allows for easy sharing and access from various devices, ensuring your work is preserved. |
Choosing the right method will depend on your personal style and how you wish to interact with your creation daily. By thoughtfully considering storage and display options, you can enjoy your artistic endeavor while keeping it safe and stylish.
Updating Your Calendar Regularly
Maintaining an organized schedule is essential for productivity and time management. To achieve this, it’s important to refresh your planning system consistently, ensuring it reflects your current tasks and priorities.
Here are some effective strategies to keep your planning system up to date:
- Set a Regular Review Schedule: Designate a specific day each week or month to assess and adjust your plans.
- Prioritize Tasks: Evaluate which activities are most important and adjust your timeline accordingly.
- Incorporate New Events: Add any upcoming commitments as soon as they arise to prevent last-minute rushes.
- Reflect on Progress: Take time to reflect on what has been accomplished and identify areas for improvement.
- Stay Flexible: Be prepared to modify your plans as unexpected events occur or priorities shift.
By regularly updating your organization system, you can enhance your efficiency and stay on top of your responsibilities, leading to a more structured and fulfilling experience.
Sharing Your Design Online
Once you’ve crafted your personalized planner, showcasing it to a broader audience can be incredibly rewarding. Sharing your creation not only allows you to receive feedback but also inspires others to explore their creativity. With various platforms available, it’s easier than ever to reach like-minded individuals who appreciate unique designs.
Consider utilizing social media platforms, design communities, and specialized websites to present your work. Each medium has its strengths, whether it be visual appeal or engagement opportunities.
| Platform | Description | Best For |
|---|---|---|
| A visually driven platform perfect for showcasing designs. | Sharing images and gaining followers. | |
| A site dedicated to discovering and saving creative ideas. | Inspiration and traffic to your own projects. | |
| Behance | A platform for creative professionals to showcase their work. | Building a portfolio and networking with other designers. |
| Facebook Groups | Communities where members share tips and ideas. | Connecting with fellow enthusiasts and exchanging advice. |
Engaging with your audience through comments and feedback can also help refine your skills and expand your network. By actively participating in discussions and collaborations, you’ll foster a sense of community around your design endeavors.